Summary
What’s up folks! In this post, we’re going to set up a simple, small AD homelab for CRTP prep and polishing our Red Team skills. There are already a number of practical AD homelab guides and YouTube videos out there, but for some reason, I found most of them difficult to follow. That’s why I decided to create my own and document the process here (so I don’t forget it myself!)
Setting up an AD homelab is crucial if you are serious about Red Teaming. Homelabbing helps you understand both sides of the coin; you’ll understand why an attack works because you were the one who set up that misconfiguration in the first place. This changed my perspective on how I approach AD environments and truly helped me in my CRTP journey.
I’m not a big fan of theory, so let’s get our hands dirty!"
Network Diagram
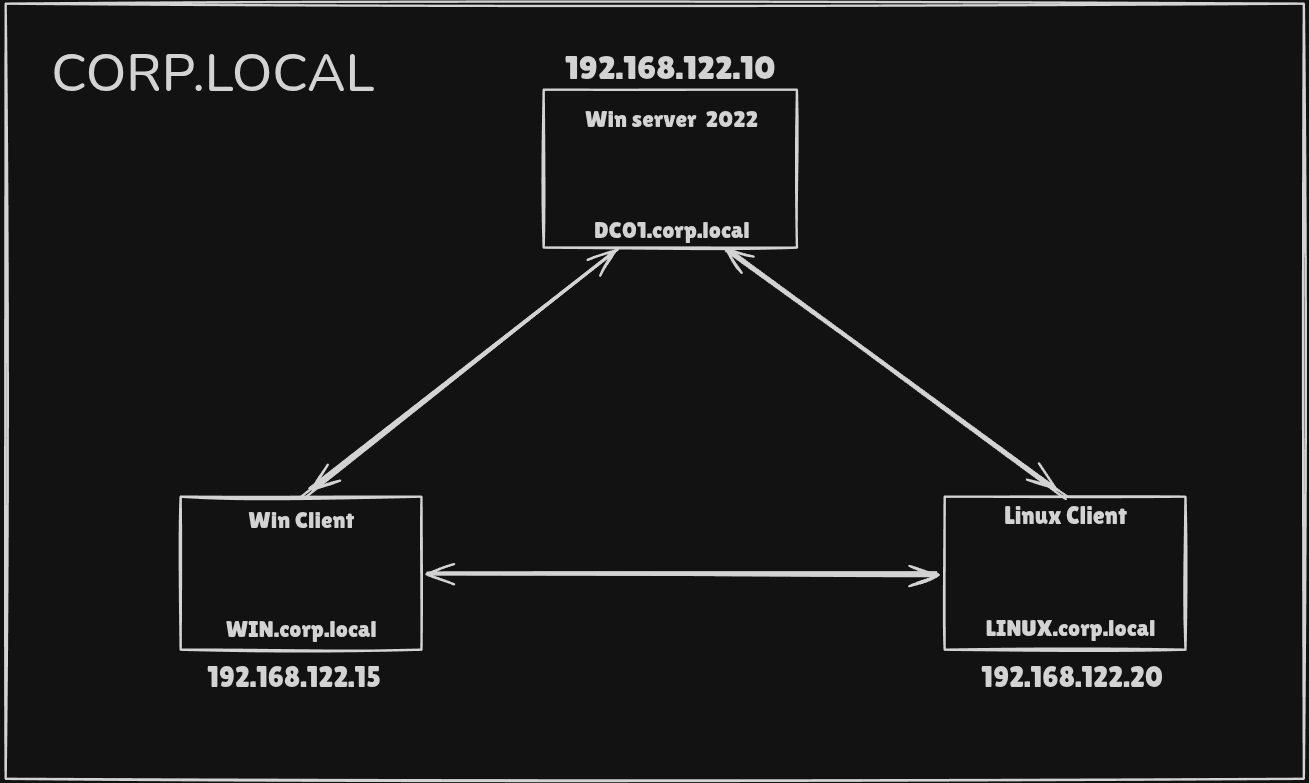
Keep in mind: The attacker machine sits outside the domain. We’re starting as an outsider with no "built-in" trust.
Prerequisites
- I am using Windows Server 2022 Evaluation in this blog because Server 2025 is still very new and Server 2022 is much balanced and updated + Windows Server 2022 Evaluation comes with a 180-day trial period.
- We would have 2 client machines to setup and pactice misconfigurations : window 11 Enterprise and Ubuntu 25.10
- For AD homelabbing, Windows 11 Enterprise is significantly superior to Home, though Windows 11 Pro is usually the most practical choice for most users. Windows 11 Home lacks the ability to join a domain, making it unusable for Active Directory client simulation
Download Links :
- Server 2022: https://www.microsoft.com/en-us/evalcenter/download-windows-server-2022
- Windows 11 : https://www.microsoft.com/en-in/evalcenter/evaluate-windows-11-enterprise
- Ubuntu : https://ubuntu.com/download/desktop
AD configuration and setup
Server 2022 setup
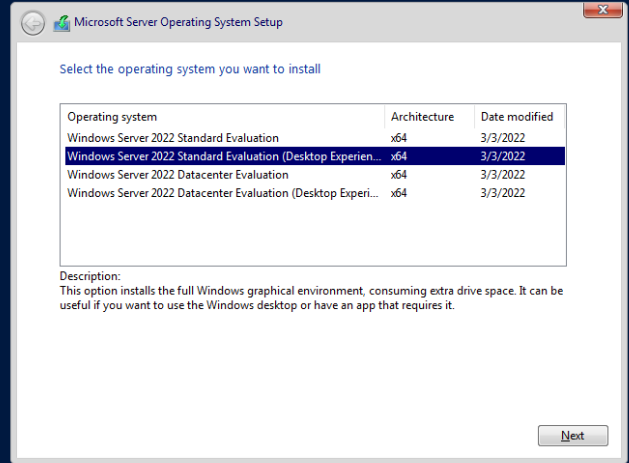
Download and Install Windows Server 2022 Evaluation
- Select Desktop Experience During installation
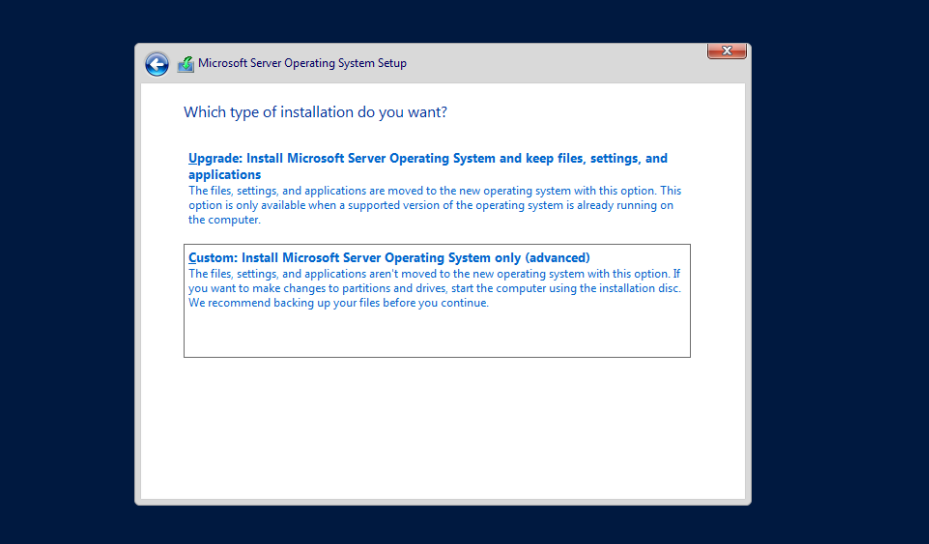
- Custom Installation
Select your Disk and Install. It might take a few minutes to completely install
After the installation completes, setup new Password and Login to the server
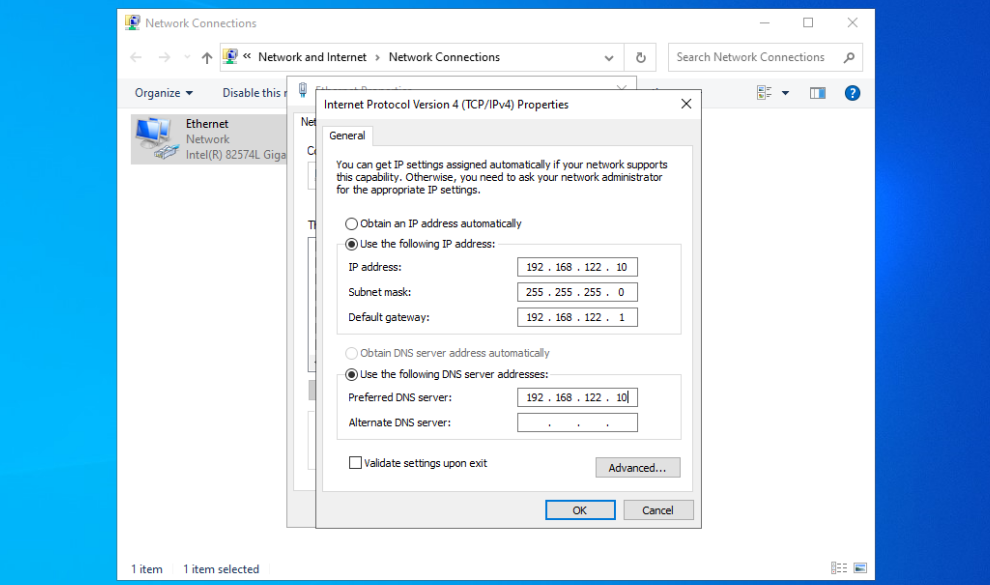
First thing we need to do after login is to Configure IP settings :
Internal IP of Server would be 192.168.122.10 According to our Network Diagram
Go to :
Control Panel → Network and Internet → Network and Sharing Center → Change
adapter settings → Right click (Properties)
There Click properties of ipv4 And Turn off ipv6 (Optional)
Edit and add
IP Address : 192.168.122.10
Subnet     : 255.255.255.0
Gateway    : 192.168.122.1
DNS        : 192.168.122.10
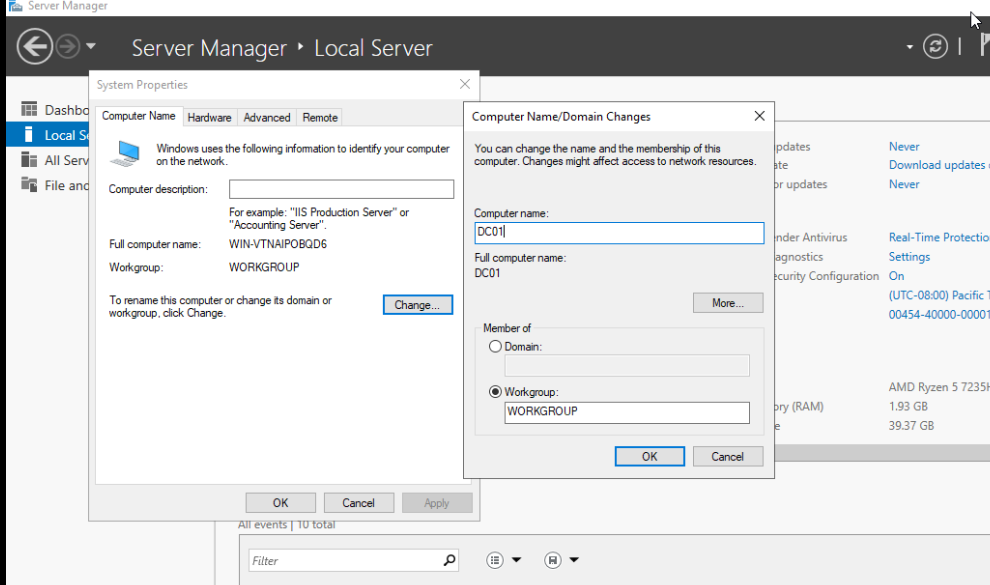
Next Rename our Computer
Server Manager → Local Server → Computer Name → Change
Change it to DC01 and this will prompt a Restart
Now the most important Step : Install Active Directory Domain Services
Go to
server manager → Manage → Add Roles and Features
There select Active Directory Domain Services ( Second Option) and Install
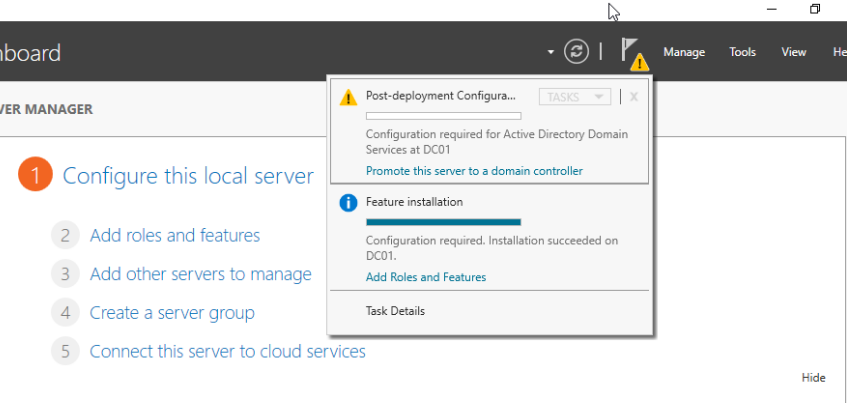
After Sucessfull installation, Click Promote Server to Domain Controller Option in Manage. It will promote our computer to DC (Domain Controller)
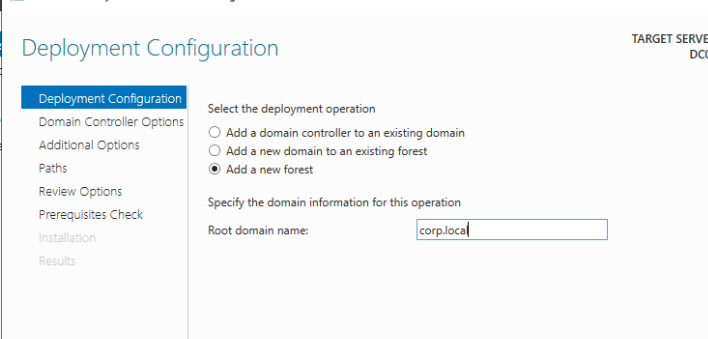
Select Add a New Forest and Name the domain corp.local (You can name anything you like)
Create a new DSRM password and click Install
The DSRM password serves as a local administrator credential required to access and repair a Domain Controller when Active Directory services are offline or inaccessible. It provides a critical “backdoor” for system recovery and database restoration during emergency maintenance scenarios
Leave everything else by Default and click next
Install and it will force Restart
If you have done everything correctly, you will see the screen below:
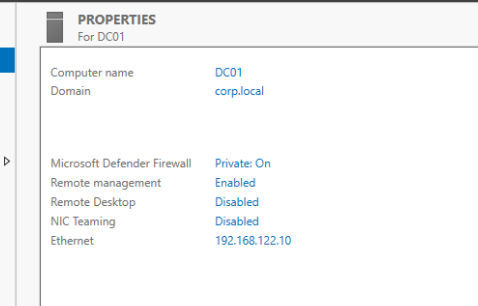
Done!
- We have finished the
Windows Serverinstallation, - Promoted the server to a
Domain Controller, and - Established the
corp.localforest
We Still need to tweak Firewall and Some settings in order to start "Attacking" the DC, Those will be covered in the Second Part of the Blog
Windows Client Domain Join
So that we created a new forest corp.local and new DC, Let’s add some client machines to the domain.
We are installing and joining our Windows 11 to DC and form our attack chain
After selecting the disk and everything the Windows will start installing
During the final setup click Sign-in Options to Join Domain
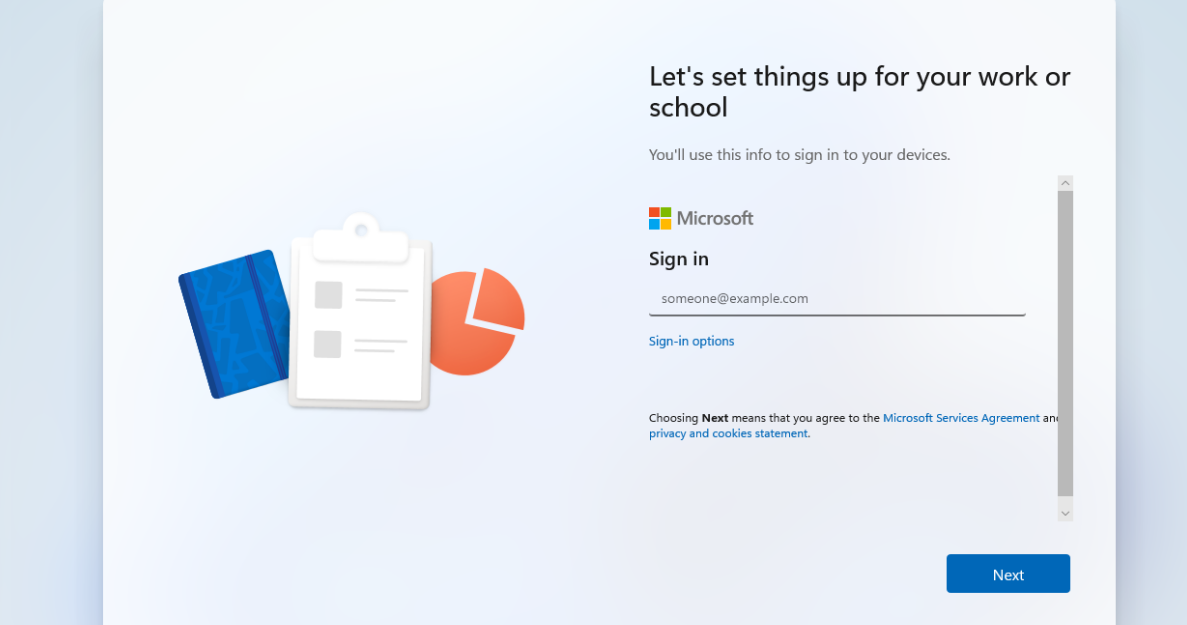
then Select Domain Join Instead and Create a local account

Wait for the installation to finish and login to Windows 11
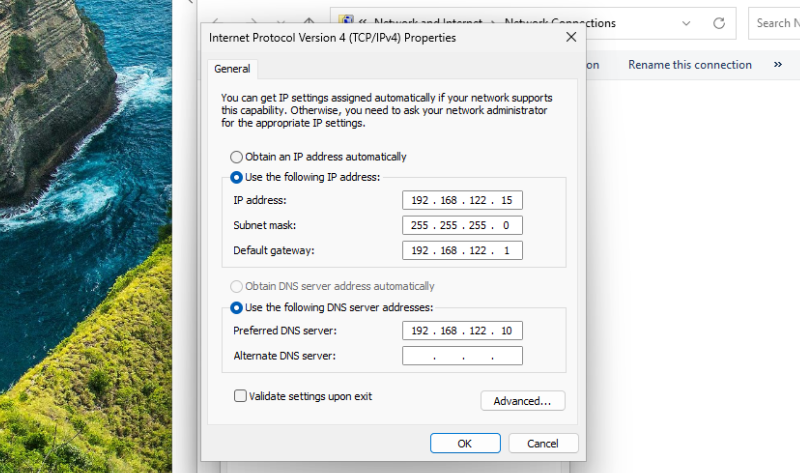
Same as in Server here also we need to Configure IP settings first
Control Panel → Network and Internet → Network and Sharing Center → Change
adapter settings → Right click (Properties)
Change it to
IP Address : 192.168.122.15
Subnet     : 255.255.255.0
Gateway    : 192.168.122.1
DNS        : 192.168.122.10
In Active Directory, computers don’t directly know where the Domain Controller is. Instead, they uses DNS to discover Domain Controllers and services, so clients must use the DC as their DNS server.
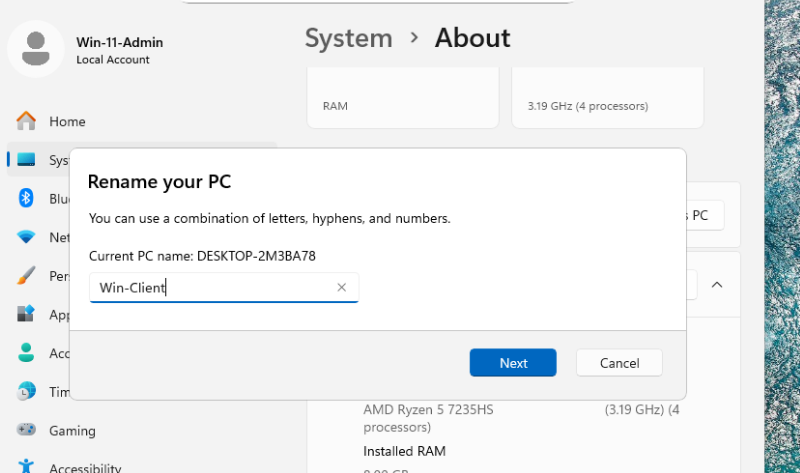
Next Rename the PC inside Settings → System → About → Rename this PC
Renamed into Win-Client and Restart
Now We Join the windows client to Domain
Navigate to
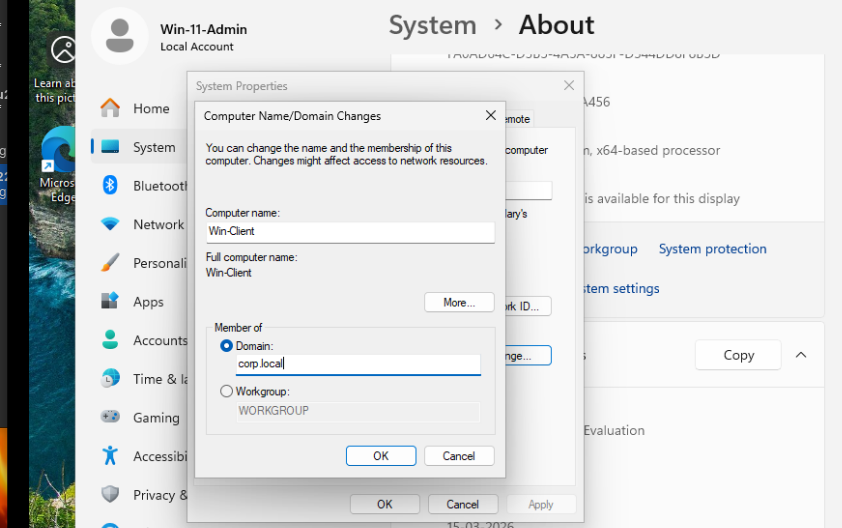
Settings → System → About → Domain or Workgroup → Computer Name → Change
Here select Member of Domain and type domain name corp.local save and it will ask for Administrator password of DC
If you succeed you will get similar message as below
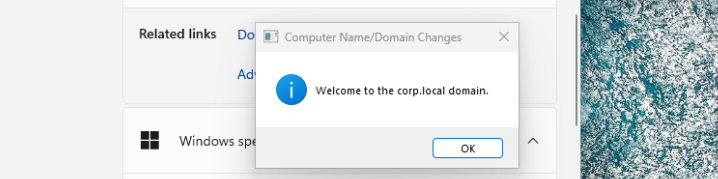
The system will restart and Done !
We have joined Windows client machine to Domain !!
Linux Client Domain Join
Now let’s install Ubuntu and Join Domain
Configure Ubuntu and start Installation
Once the installation completes Add DNS server in Network settings.Open Wifi settings -> Select Network -> Network Option -> IPV4 Settings
IPv4 Method → Automatic (DHCP)
DNS → 192.168.122.10

Next Change Computer name
sudo hostnamectl set-hostname ubuntu-client.corp.local
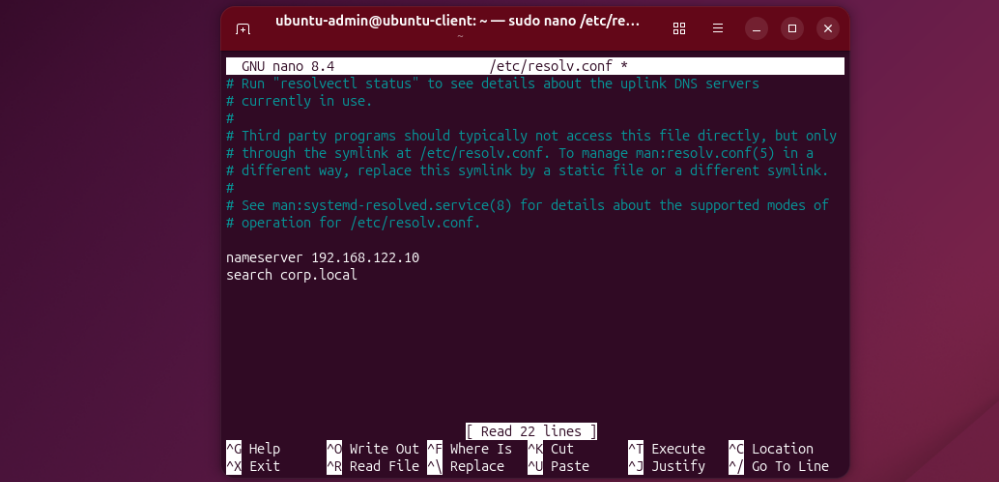
Now an important step. Let’s edit resolv.conf file
Add this to the bottom of /etc/resolv.conf
nameserver 192.168.122.10
search corp.local
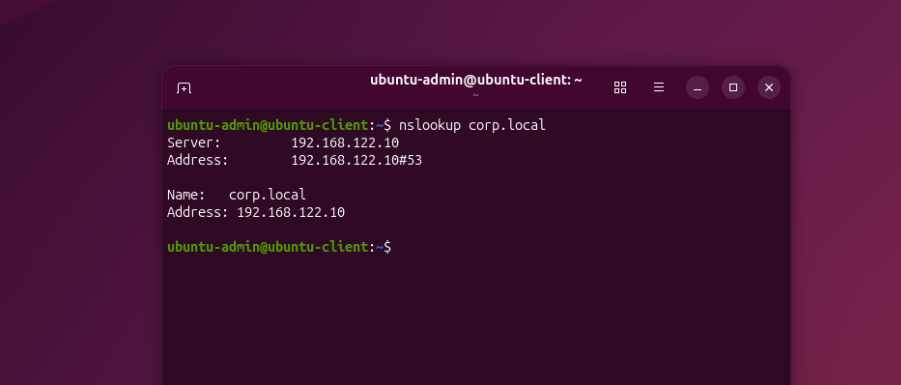
Check if the Client can communicate with DC
nslookup corp.local
Everything good if the output shows similar to below
Now We Join the Ubuntu client to Domain
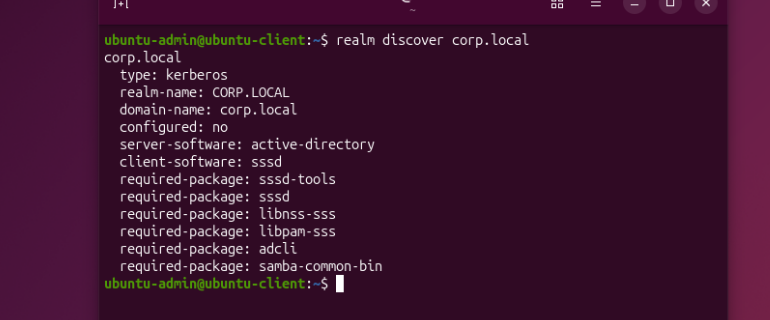
realm discover corp.local
sudo realm join corp.local -U Administrator
This will prompt for DC admin password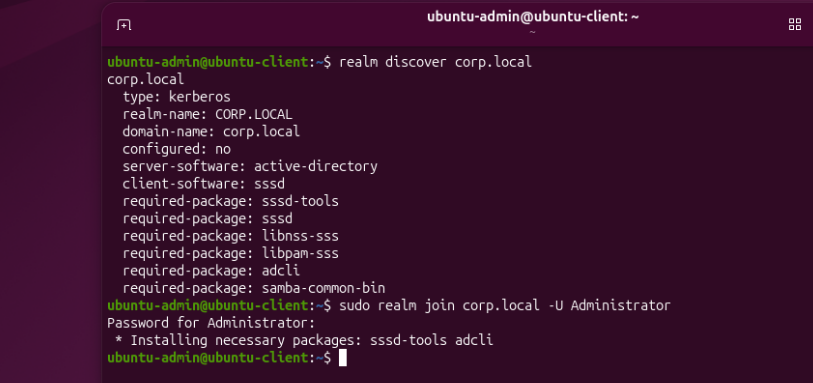
Done !!! we have now joined 2 client machines into Domain
Alternatively we can check in DC if both are joined sucessfully
Open Active Directory Users and Computers Select Computers
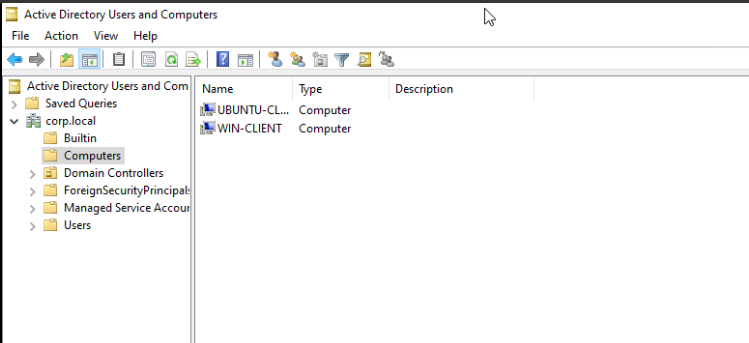
Here we can see both the computers are present
Conclusion
And that’s a wrap for Part 1!
At this stage we have successfully:
- Installed Windows Server 2022
- Promoted it to a Domain Controller
- Created our corp.local forest
- Joined two client machines to the domain
- Windows 11 Client
- Ubuntu Client
We now have a Domain Controller and two client machines successfully joined to the corp.local domain, forming the foundation of our Red Team practice environment.
In Part 2, we’ll start making the lab more realistic by adding users, groups, and intentional misconfigurations, and begin exploring Active Directory enumeration and attack paths.
Stay tuned. 🚀
If you found this guide helpful or want to follow along with more Active Directory, Red Teaming, and homelab research, feel free to connect with me.